

Most small greenhouses need less foundation than people expect. For a typical backyard hobby kit, the right foundation is a level, well-drained gravel base inside a treated-wood or block frame, not a full concrete slab. Pour concrete when the greenhouse is heavy, glass-walled, large, or meant to stay for decades, or when you need a sealed floor for carts or wheelchairs.
What foundation does a greenhouse need?
The right base depends on four things: how heavy the greenhouse is, how big it is, how long it will stay, and what you plan to grow. A light polycarbonate kit for spring seedlings needs a flat, stable, dry pad. A glass greenhouse needs something much stiffer, because glass panels crack when the frame shifts.
Greenhouse builders generally choose from five foundation types:
- Gravel foundation: crushed stone inside a timber or block border.
- Concrete slab foundation: a poured floor under the whole greenhouse.
- Pier and landscape-tie foundation: treated timbers resting on concrete piers or on leveled ground.
- Concrete pier foundation: concrete posts set into the ground at the corners and along the walls.
- Concrete knee-wall foundation: a short concrete or block wall that the greenhouse sits on.
Read the kit manual before you buy a single bag of anything. Some greenhouse makers highly recommend either a solid concrete slab or an outline footing, which is a concrete strip under the walls only. If your warranty names a specific base, follow it.
Why a level base matters
A small greenhouse frame is a box of thin metal or wood, held square partly by its panels. When one corner sinks, the box twists. As a result, doors stick, sliding panels jam, and polycarbonate sheets pop out of their channels on the first windy day.
Drainage matters as much as strength. A base that sits in a wet spot rots wooden frames, rusts fasteners, and keeps the floor damp. Damp floors raise humidity, which feeds mold, algae, and fungus gnats.
Wind is the third reason. A light kit catches wind like a sail. Without a solid base to anchor into, it can lift, slide, or fold. The foundation is the thing your anchors hold onto, so a weak base makes good anchors useless.
Gravel is the best default for most small greenhouses
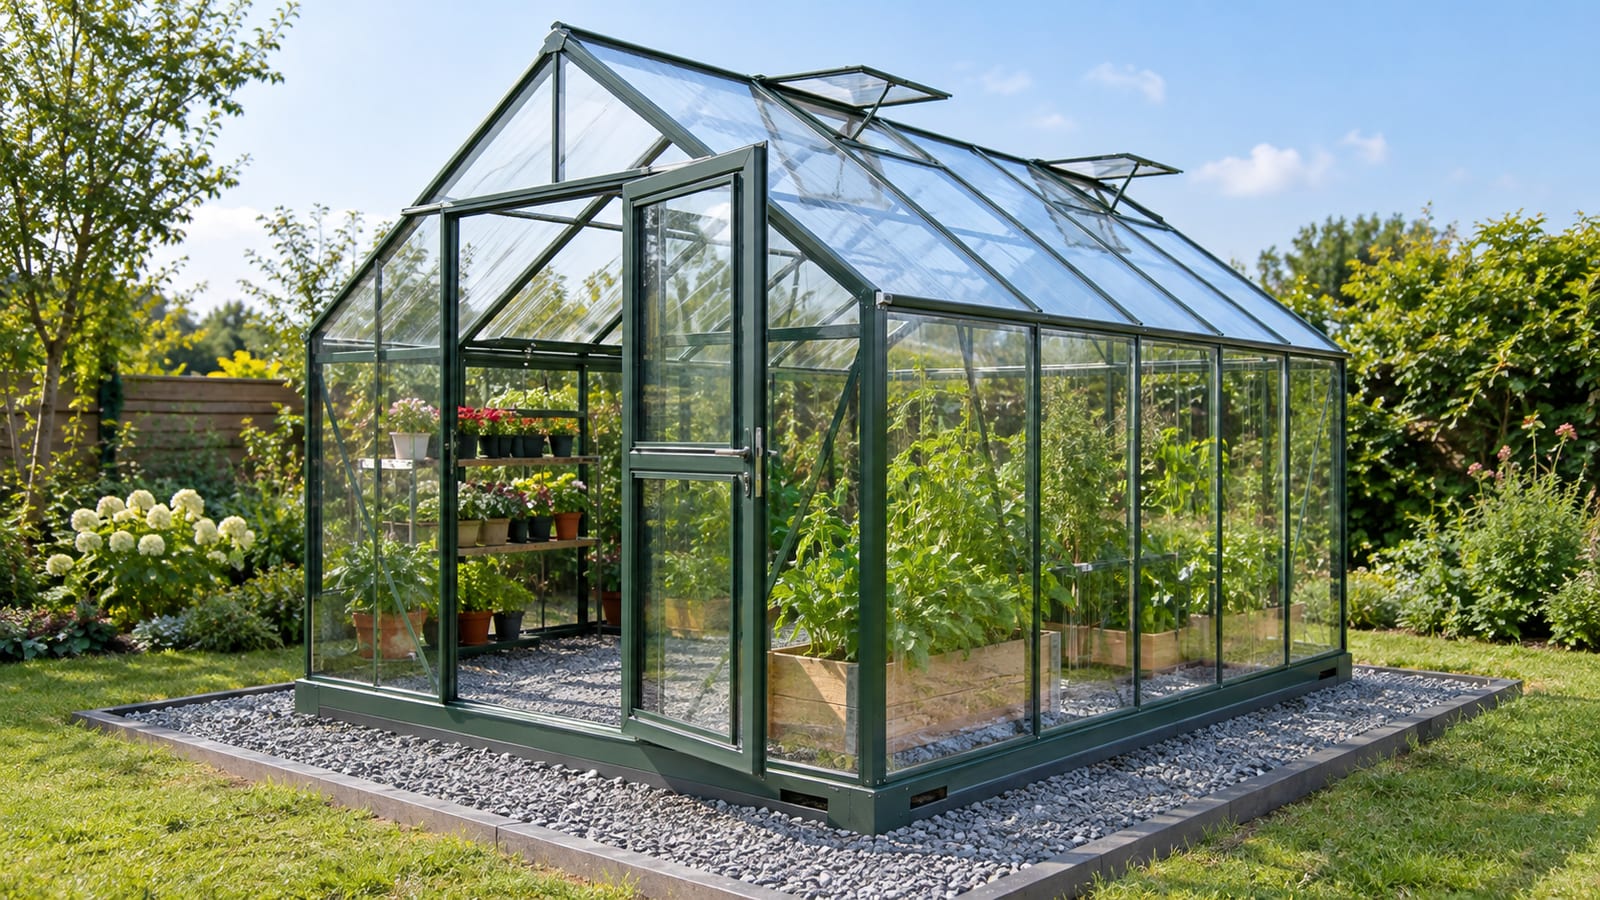
Gravel wins for most hobby greenhouses because it drains, costs far less than concrete, and goes in without a concrete truck. It also forgives you. If one corner settles after the first winter, you can rake, add stone, and tamp it level again.
Here is the basic build:
- Mark the footprint and strip the sod and soft topsoil.
- Level and compact the soil underneath.
- Build a square frame of ground-contact treated timber or concrete blocks, and check that both diagonals measure the same.
- Lay landscape fabric to slow weeds.
- Fill with a few inches of crushed, angular stone and compact it in layers.
- Anchor the greenhouse frame to the border or to ground anchors driven into the soil.
Choose crushed stone with sharp edges. Round pea gravel rolls under your feet and never locks together, so the base keeps shifting. Crushed stone packs down into a firm surface that still lets water through.
Gravel has limits, however. Weeds will find the edges, and the surface is hard to roll a wheelbarrow or wheelchair across. In high-wind sites, a gravel pad alone gives anchors less to grip. Pair it with piers or deep ground anchors.
When a concrete slab is worth the cost
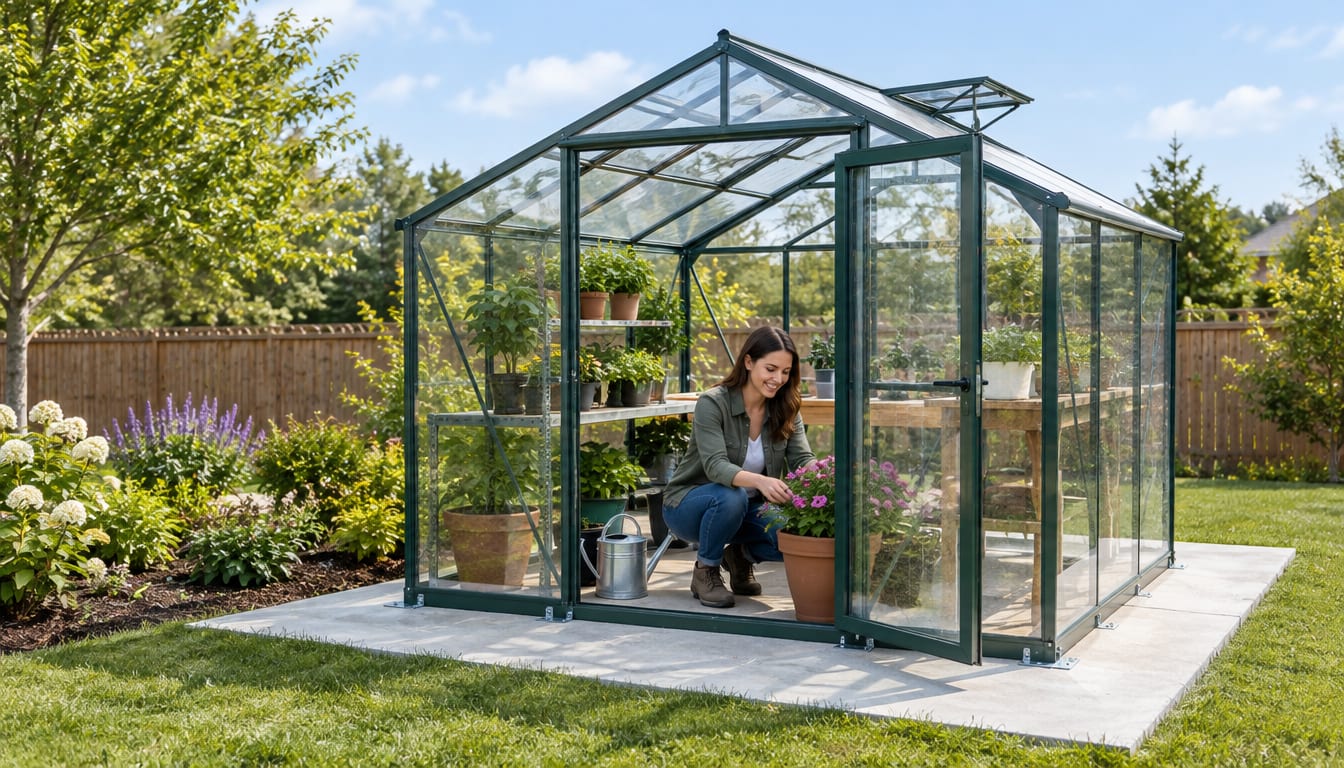
A slab earns its price in a few real situations. A glass greenhouse needs the rigid support. A large walk-in structure benefits from the permanent, bolt-down anchoring. A slab also makes sense if you need smooth, step-free access for a wheelchair or cart, or a floor you can scrub and disinfect between crops.
Outside those cases, concrete often adds cost without adding much growing. A slab is expensive, can't be moved, and may need a permit. It also needs a slope and a floor drain, or every watering leaves puddles that turn slick and green.
Skip the upgrade if your reason is that it looks more finished. A light polycarbonate kit for tomatoes and seed trays doesn't grow anything better on concrete. It merely stands on a more expensive, less forgiving floor.
Full slab or perimeter footing
If you do want concrete, you have two main choices. A full slab covers the whole floor. A perimeter footing, the outline footing some makers recommend, runs a concrete strip under the walls and leaves the inside open.
| Feature | Full slab | Perimeter footing |
|---|---|---|
| Drainage | Needs a slope and floor drain | Interior drains naturally through gravel or soil |
| Growing in the ground | Not possible | Possible inside the footing |
| Anchoring | Excellent, bolts anywhere | Excellent along the walls |
| Floor finish | Smooth, cleanable, cart-friendly | Gravel, pavers, or soil beds |
| Winter feel | Cold underfoot unless insulated | Soil stays a little warmer |
| Concrete needed | Most | Much less |
For most people who want concrete, the perimeter footing is the better trade-off. You get stiff walls and solid anchor points, and the floor still drains. A full slab is the choice when the floor itself matters more than the soil under it.
Insulating the edge
If you'll heat the greenhouse in winter, heat leaks out through the edge of the base. Rigid foam board along the outside of the footing, buried in the ground, cuts that loss. It's a cheap step during construction and an awful one to add later.
Raise the base above the water
One polycarbonate kit maker's instructions ask for a base exactly the shape and size of the greenhouse. The same instructions say to set it in a flood-protected area, preferably raised about 6 inches. That way the panels hang over the edge of the base and shed rain outside, so water doesn't run underneath. The idea applies to almost any kit: a slightly raised base keeps the floor drier.
Piers, landscape ties, and knee walls
Concrete piers are a strong choice on slopes, rocky ground, or sites where the soil freezes hard. Each pier sits deep enough to stay below the frost, and a treated-wood sill frame rests on top. Because you dig only holes, piers disturb less soil than a slab.
Landscape ties are the budget option. Treated timbers laid on leveled, compacted ground can support a light kit in a sheltered yard. Still, they rot over time, shift with frost, and offer weak anchoring. Use them for small greenhouses only, and stake them deep into the ground.
Avoid ties alone for a large greenhouse or a windy, open site. In those spots, set the ties on piers or move to a perimeter footing.
A knee wall raises the whole greenhouse on a low concrete or block wall. It adds headroom, holds a bit of heat, and protects the bottom panels from mower and boot damage. However, it's permanent and costly. Save it for glass houses, lean-tos against the home, or structures you'll keep for decades.
Pick the spot before you build the base
The best foundation can't save a bad location. Check these before you dig:
- Sun: the brightest spot you have, especially in winter.
- Drainage: watch where water sits after a heavy rain, and avoid those spots.
- Wind: a fence or hedge upwind helps, as long as it doesn't shade the greenhouse.
- Access: a clear path to the door and a short reach for the hose.
- Utilities: have buried lines marked by your local call-before-you-dig service, and plan any power or water lines now.
- Tree roots: roots lift bases and crack slabs over the years.
- Snow: keep clear of roofs that dump snow or ice onto the greenhouse.
- Clearance: leave room to work on all sides so you can clean panels and reach fasteners.
How much sunlight does a greenhouse site need?
Give it the most sun your yard can offer, and judge the site by winter light. In summer, almost any open spot gets plenty of sun. In winter, the sun sits lower and shadows stretch longer. A fence or a neighbor's house can then shade the greenhouse for most of the day.
Check the site in late fall if you can, at several times of day. Across most of the US, an open view to the south matters most. Many growers also run the long side east to west so more panel area faces the low winter sun.
If winter light is poor, change the plan before you change the yard. Use the greenhouse for spring starts and summer crops, or add grow lights for winter seedlings.
Anchoring, frost, and the loads you can't see
Frost is the quiet enemy of a greenhouse base. When wet soil freezes, it expands and pushes up, a process called frost heaving. It lifts one corner more than another, and the frame twists. Piers and footings avoid this by reaching below the frost line, the depth soil freezes to in your area. Your local building department can tell you that depth.
Prepare the soil before you level anything. Remove sod, roots, and soft topsoil, because they rot and settle. Then compact what's left until it doesn't give under your boot.
Get the base level and square. Many kits need the base level and square within tight limits, so check the manual for the exact tolerance. Use a long level or a laser level, and measure both diagonals.
Anchoring holds the greenhouse down against wind lift. Bolts into concrete are strongest. On gravel or timber bases, use auger or ground anchors driven deep into firm soil. In snow country, look up the kit's snow rating, and make sure the base keeps the walls from spreading under a heavy roof.
A simple decision by size and goal
Use this as a starting rule, then adjust for your climate and site.
| Your greenhouse | Start with | Upgrade if |
|---|---|---|
| Mini plastic or pop-up growing house | Leveled, compacted ground or pavers, staked or weighted | It blows over even once |
| Standard polycarbonate hobby kit | Compacted gravel in a treated-timber or block frame, anchored | The site is windy, sloped, or prone to frost heave |
| Kit in a windy or frost-prone yard | Gravel floor on concrete piers or a perimeter footing | You plan to heat it all winter |
| Glass or large permanent greenhouse | Perimeter footing, or a knee wall | You need a sealed, cart-friendly floor |
| Greenhouse needing step-free access | Full slab with a slope and floor drain | Not needed |
The short answer for most readers is the second row. Start there unless your kit, your climate, or your plants give you a clear reason to move down the table.
Drainage and the floor you'll stand on
Standing water is the most common floor problem. It raises humidity, breeds algae, and makes the floor slippery. So raise the base slightly, slope the ground around it away from the greenhouse, and never build in the yard's low spot.
Your floor choices each solve a different problem:
- Gravel: drains well and costs little, but it's hard on carts and lets weeds creep in at the edges.
- Soil beds: let you grow crops in the ground, though weeds and soil pests come along.
- Pavers on sand: give you a firm path that still drains between the joints.
- Sealed slab: cleanest and easiest to roll across, but only if it slopes to a drain.
A mix often works best. For example, run a paver path down the middle and keep gravel or soil beds under the benches. You get firm footing where you walk and drainage where you water.
Foundation mistakes that cost a season
These errors show up again and again in small greenhouse builds:
- Eyeballing level. Ground that looks flat rarely is. Use a level and check both diagonals.
- Untreated or shallow wood. Ordinary lumber on wet soil rots fast. Use wood rated for ground contact, and set it firmly into compacted soil.
- Loose or round gravel. Pea gravel and uncompacted stone shift until the frame twists.
- Blocked drainage. A solid border with no outlet can trap rainwater inside the base.
- Skipping anchors. A light kit with no anchors depends on calm weather to stay put.
- Building under trees. Branches drop limbs and sap, leaves block light, and roots lift the base.
Most of these cost almost nothing to avoid during the build. Fixing them later means taking the greenhouse apart.
FAQ
Can a greenhouse sit directly on grass or bare soil?
A small temporary growing house can, for a season or two. A permanent kit should not. The grass dies and rots, the ground settles unevenly, and the frame stays damp. Strip the sod and build at least a compacted gravel pad.
Do I need a permit for a greenhouse foundation?
It depends on your town. Many places exempt small accessory structures, but rules change with the size, a poured slab, electrical work, and how close you build to the property line. Call your local building department and check any homeowners association rules before you buy materials.
Can I put a greenhouse on an existing patio or deck?
A level, well-drained concrete patio can work well. Bolt the frame down with masonry anchors and check how water drains off the surface. A deck is riskier, because wet soil, pots, and water tanks get heavy fast. Have a qualified builder confirm the deck can carry the load and resist wind lift.
Can I move a greenhouse to a new spot later?
Yes, if it sits on gravel, timbers, or pavers. You unbolt the kit, move it, and rebuild a base in the new spot. A slab or footing stays where you poured it, so take your time choosing the location before any concrete goes in.